
Welcome to my world of Sn3 Scale Model Railroading

Sn3 Coupler Height Gage
By
Tom Troughton, MMR
| I've gotten frustrated trying to determine and check coupler heights on equipment since changing over to Sn3 several years ago. PBL's 3-point height gauge is fine but I wanted more. My problems mostly stemmed from not being able to determine the correct height to mount a Kadee coupler box to the underside of the floor of brass cars. I solved the problem by constructing a simple gage out of styrene. The following photos describe the gage and show it in use. | |
 Photo 1. The basic gage is made up of six layers of .060", one of .080" and one of .020" styrene and three layers of the .008" acetate that used to be included in building kits for window glazing. |  Photo 2. Here's a side view of the gage. Notice that there's a wide piece of the .060" styrene for the base to evenly support it on the rail heads. That layer, plus four more, account for the main structure. Look carefully and you can see the three layers of acetate directly under the Kadee coupler pocket. To make the tab that helps determine the floor height for mounting the Kadee coupler box to the car, I used one more layer of the .060" plus one layer of .080" styrene. I shaped the .080 piece into a narrow point to be able to work it in between any air line piping that might be in the way on a car. |
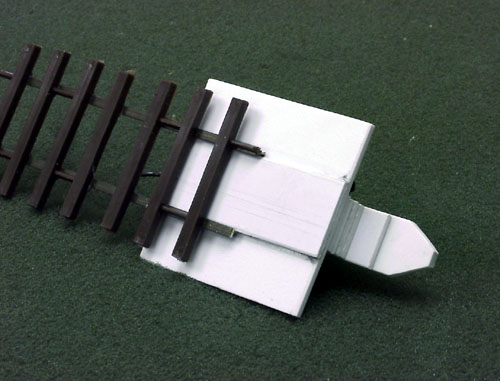 Photo 3. This underside view shows the piece of .020" styrene that I cut to fit exactly between the rails. It also help secure the height gage in place. |  Photo 4. If you should happen to have a hold over from your HO days, such as the Kadee couple height gage, you won't be too far off the mark. Before I constructed this new gage, I used my old HO Kadee one for more than six years to check equipment and it proved to be quite reliable. |
 Photo 5. The pointed end is positioned up against this Overland Ditcher OX and indicates that I'll need to insert a little more than 1/8" of shimming material to provide a correct mounting surface for the Kadee mounting box. |  Photo 6. The tender coupler of this PBL K-36 is correct, as indicated by this view. |
 Photo 7. |  Photo 8. |
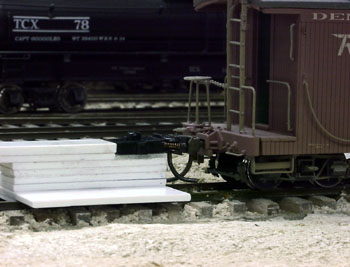 Photo 9. | 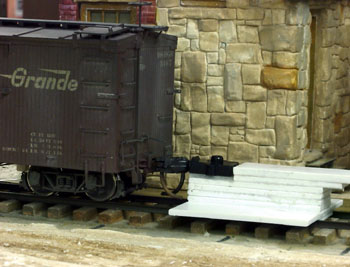 Photo 10. |
| Photos 7 through 10 show the height gage in use. All of the equipment being check passed with flying colors. If there was a problem, one of Kadee's "over" or "under" slung couplers might do the job. | |
 Photo 11. However, the pilot coupler on this locomotive will have to be raised to the upper slot of the couple pocket. | |
| I'm happy with the results of this simple project. I now have an aid that will help me determine the correct coupler mounting height for Sn3 equipment. | |
Click Here To Return To Railroad Home Page