
Welcome to my world of Sn3 Scale Model Railroading

Installing Glazing
In Tender Dog House Windows
By
Tom Troughton, MMR
 The process of painting and weathering a steam locomotive is involved and time consuming. Once the process of adding or removing detail castings, painting and weathering are completed, there's one more step that brings a model locomotive to life. That's the addition of window glazing to the engine cab and tender dog house windows. |
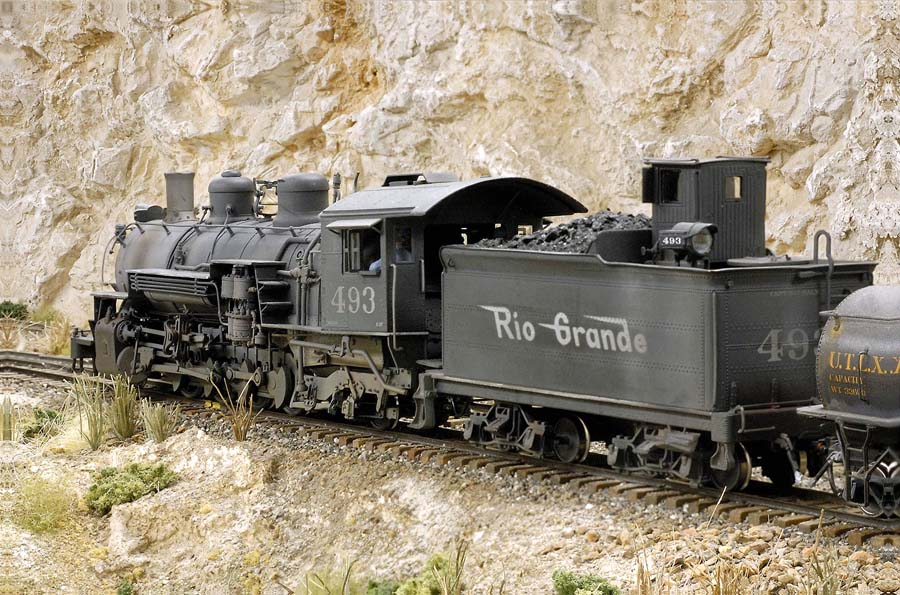
 Photo 1. Here’s the completed engine crossing Bloody Gulch on the Cimarron & Tall Timbers RR. The acetate window glazing for both the engine cab and tender dog house was attached with Future Floor Wax. |  Photo 2. Here's the finished locomotive working the main line of the Cimarron & Tall Timbers RR. All the acetate glazing for both the engine cab and tender dog house windows was attached with carefully applied Future Floor Wax. |
 Photo 3. The pointed tips of a pair of calipers were used to measure both the width and height of the window openings of the dog house on a PBL K-37 engine. |  Photo 4. These dimensions were then used to measure and cut a slightly larger piece of acetate that would be used for the glazing. The acetate was left over from window material that was included in a structure kit. |
 Photo 5. Resetting the calipers to the width of the window opening, two slight depressions were made with the sharp tips of their jaws. The pointed end of a dental explorer was used to make two tiny holes through the two depressions. |  Photo 6. A single 6" or 8" strand of .003" diameter wire that I unwound from a short length of flexible wire was gently pushed half its length through one of the holes and routed back through the other one. |
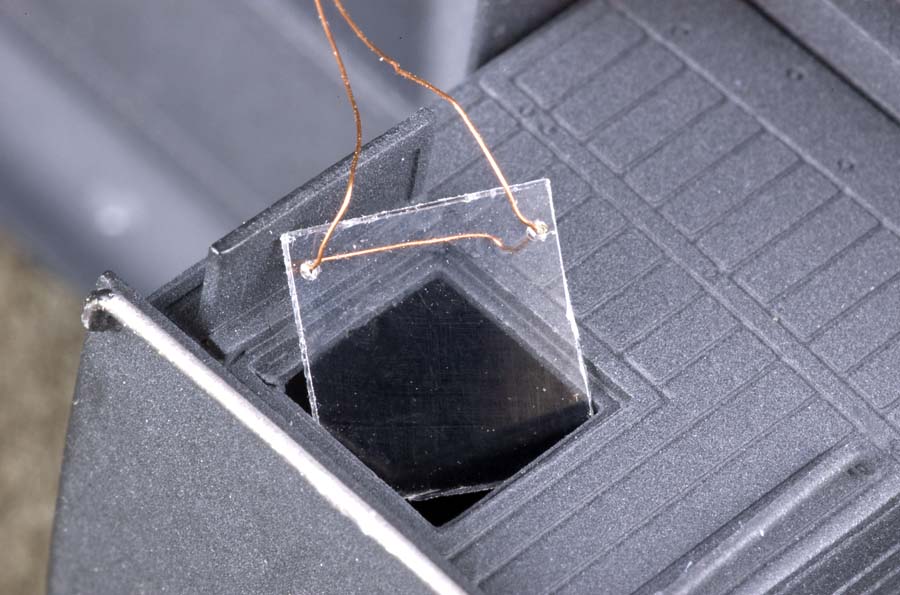
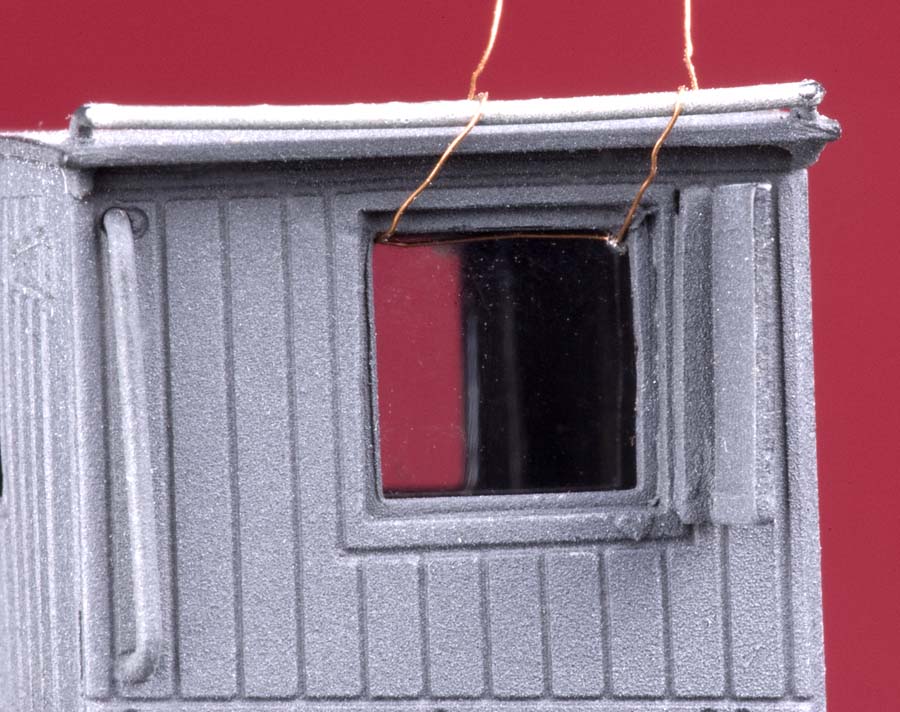
 Photo 7. The tiny wire was then carefully pulled tight against the inner surface of the acetate then carefully slid diagonally through the window opening into the dog house.. |  Photo 8. Once the glazing was completely inside, the wire ends were gently pulled straight out and upward until it was in the upper corners of the window opening, then they were gently pulled over the top of the dog house being careful to not scratch the paint. Since the acetate is slightly larger than the opening, it pulled itself tight against the inner surface around the window opening. |
 Photo 9. I used the two prong tip of my CA applicator to apply a small amount of Future Floor Finish to the lower edge of the acetate, then gently pulled on the wires until it pulled itself against the inner face of the dog house. Making sure that the acetate didn't fall away towards the inside, I set the tender aside until the Future had dried. Be careful with this step because you don't want any Future to touch the small strand of wire or else it will be bonded in place. |  Photo 10. Once the Future has dried, carefully push one of the wire ends back through the hole until it's almost inside. You may want to use the sharp end of the dental explorer to actually push the end of the wire into the dog house interior. Then gently press or pull the other end of the wire around in its hole until it works itself loose. Once loose, slowly and carefully pull it out its hole. If successful, you should be able to pull the wire completely out of the acetate. Use the prong tip applicator to add more of the Future liquid around the rest of the acetate, being careful not to press too hard. The dried Future at the bottom should hold the glazing in place. |
 Photo 11. It may take a few applications of the Future Finish to completely fill in the two holes to the point where they will almost dissappear. |  Photo 12. I might add here that the acetate glazing for the cab and door windows as well as the headlight were secured in place with the Future Floor Finish also. |
 Photo 13. Here's a final shot of the completed engine about to get its tender filled with coal from the tower on my layout. Besides having glazing in the cab windows for the engine crew, the brakeman also has some protection from the elements because there's glazing in his dog house windows as well. While I used this technique on my Sn3 locomotives, it should work for smaller scales as well. It will just take a bit more patience to work in the smaller scales. I might add, it you do make a mistake with the application, the Future liquid can be removed by carefully brushing and dabbing ut up with a cotton wrapped swab soaked with ammonia. I learned that little trick the hard way. Good Luck and Happy Modeling. | |
Click Here To Return To Railroad Home Page